This shows some strategic ideas from Orcika Korps II - FULL, both to give a better idea of how to play that scenario, but also to show strategy ideas that might be helpful in other OrcConquest games.
If you don't take Alexandria by turn 24, the French capital moves to Casablanca, and an immediate victory is impossible. A moderate victory can be achieved by holding out against the combined Allied armies until turn 38 or so. If you haven't captured Alexandria by the time Montgomery starts his offensive on turn 27, you are probably doomed.
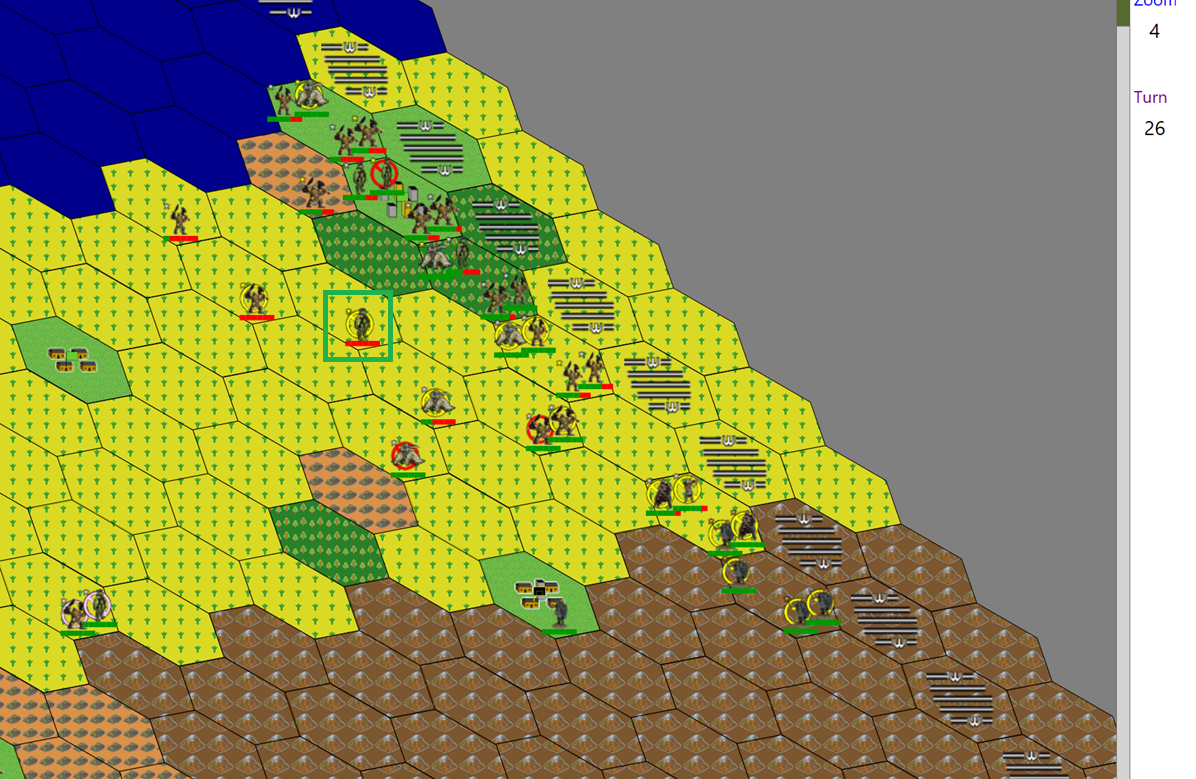
Here I captured Alexandria on turn 25, after a vicious fight at El Alamein. Both the Orcika Korps and the Italians have taken serious losses, but were successful and took the British capital (here). We've been notified Montgomery lost half his reinforcements, so he might be survivable.
This is the situation at the end of Italian turn 26. Now what?
Normally, my Rommel instincts would be to position my troops 4 or 5 hexes back from the barrier line and get a first strike on the British when they move up. Unfortunately, that would mean abandoning Alexandria, which is unacceptable.
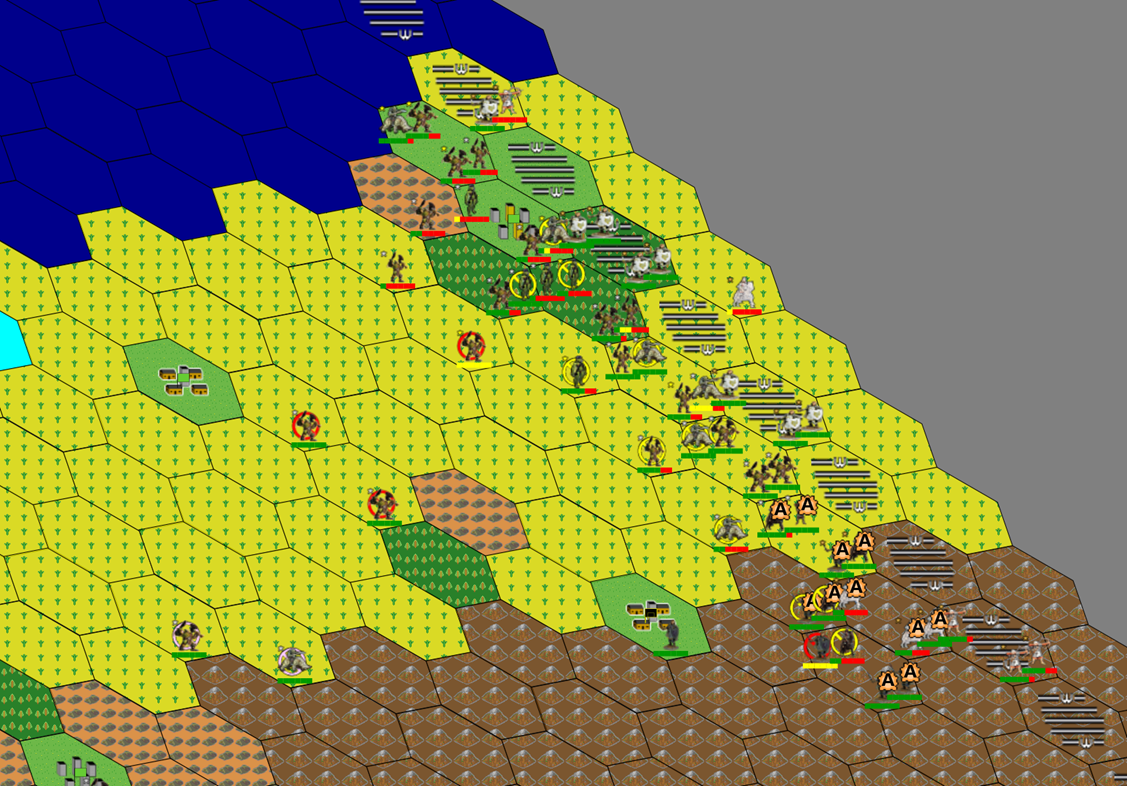
So we form up a defensive line on Alexandria, Germans to the North, Italians to the South. Keep in mind the British can show up a few hexes into the mountains in the south. But with my limited forces, we'll have to hope that they don't show up on the South end. Even if they do, the rugged terrain will slow them down.
A straight line with 4 units/hex gives the most solid coverage against the enemy assault. No matter where they hit, the best they are going to get is a 2-1 numbers advantage, and German (Orc) units are generally better than their British equivalents. Hopefully we shall take their intial assault with only moderate damage.
Next is to be very consciencious about unit repairs. You can fix up one unit per turn - use it! In this case, I've highlighted a likely candidate, a mangled gold star unit.
Our German turn is coming up, the last calm before the storm. I'll fix that unit, and plug the gap as best I can. Units in the line will not move, where possible, so they will be dug in.
The British are coming. Here's how it looks at the end of the German turn.
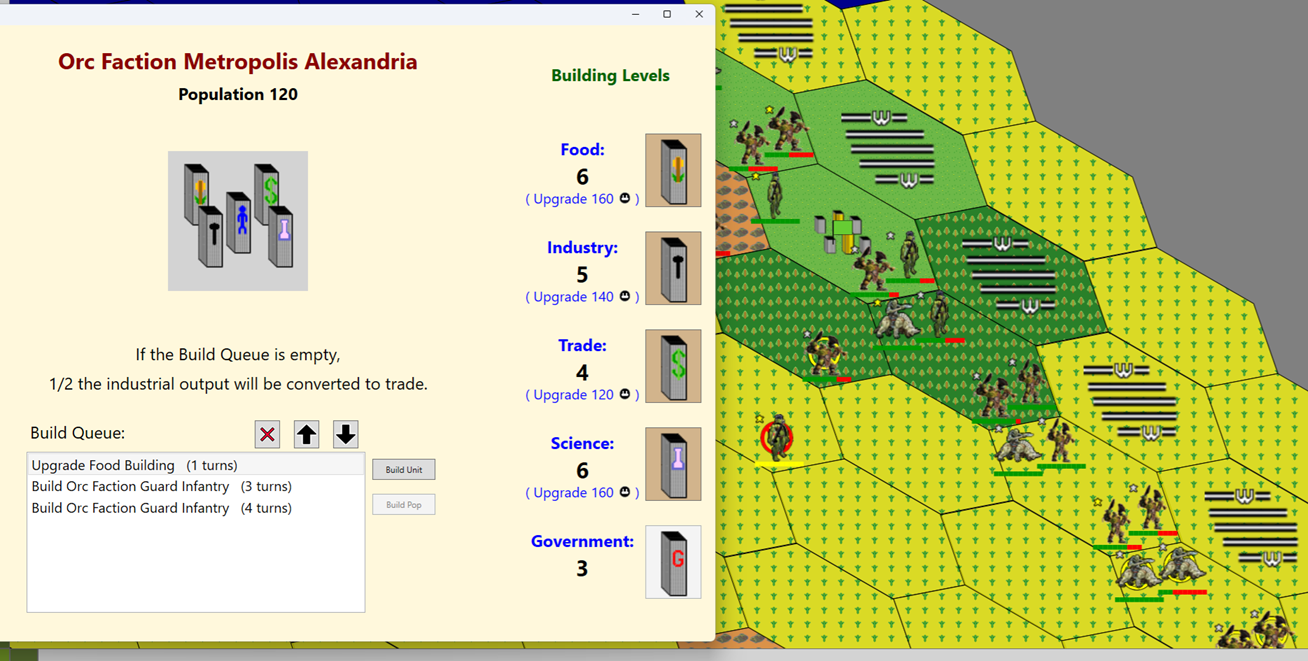
I repaired the unit mentioned, moved troops to fill the hole, and moved up various units from off the visible map to generate some reserves. At this point, economic development needs to go out the window. All dwellings need to produce troops where possible.
I'm taking some risk here. You can't do a troop build (or put produced units in there) if you already have 4 units in the hex. Alexandria is the only Metropolis on the map, so I have the unprecedented luxury of building Guard Infantry units here. So I put 3 strong units there, and once my food production completes, I'll build Guards there as long as I can.
The Orcika Korps is as ready is it can get on Turn 27
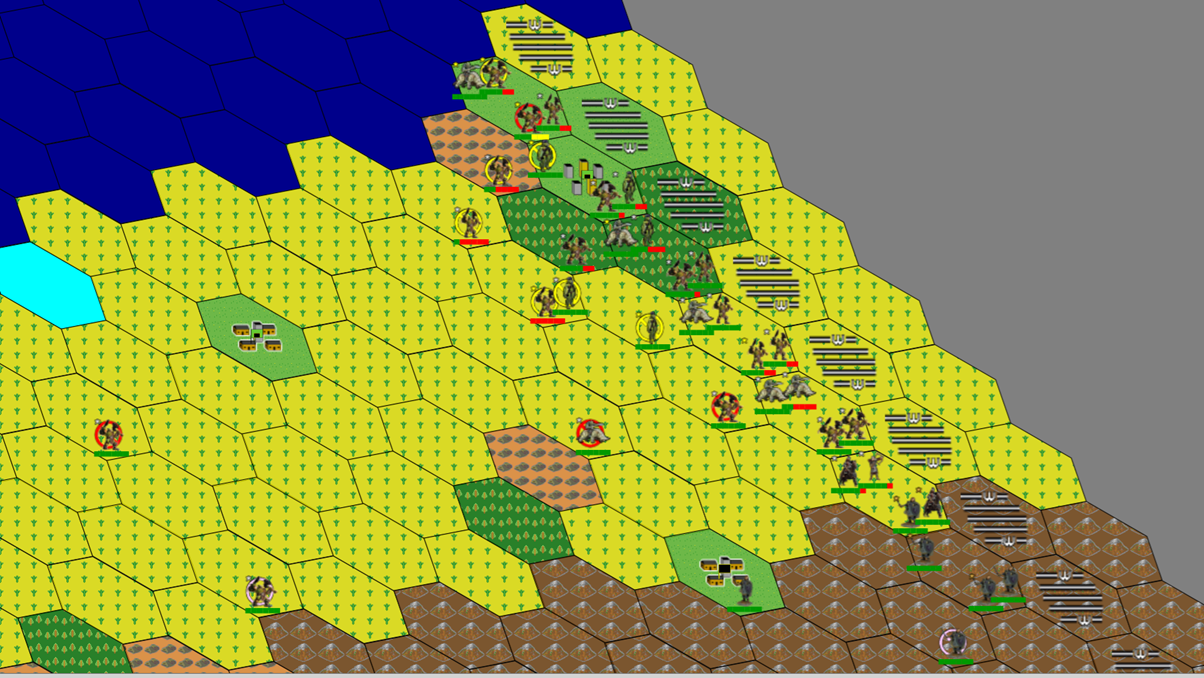
However, nothing happened on their turn 27, Monty was late (Surprise, surprise (insert sarcasm here)). Perhaps he was trying to figure out why his phone call to Alexandria did not go through as dialed. My Orcika Korps repaired another unit, swapped out some units for better ones, and generally did what other preparations they could do.
However, the British reinforcements did hit the following turn, and fairly hard. They did make a bid for Alexandria, but fortunately did not have enough units in the attack to succeed. It's always nice to see that "Futile Attack" message when it's the enemy's attack. Despite the mountain positions, the Italians lost the battle in their corner.
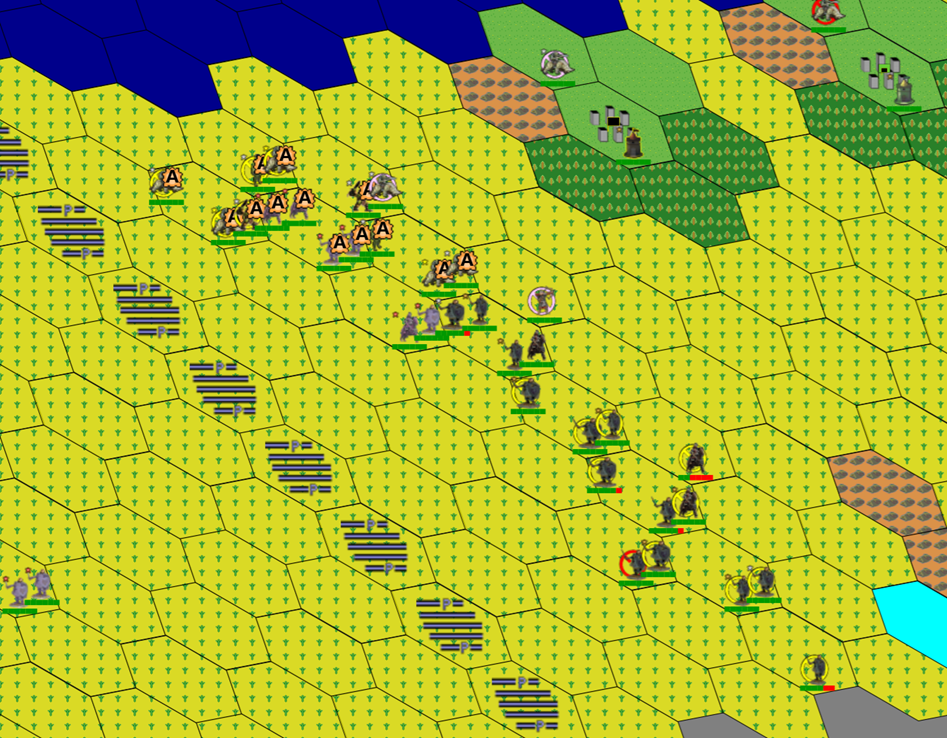
Below are the Orcika Korps plan for the next turn. The Korps is depleted - not toothless.
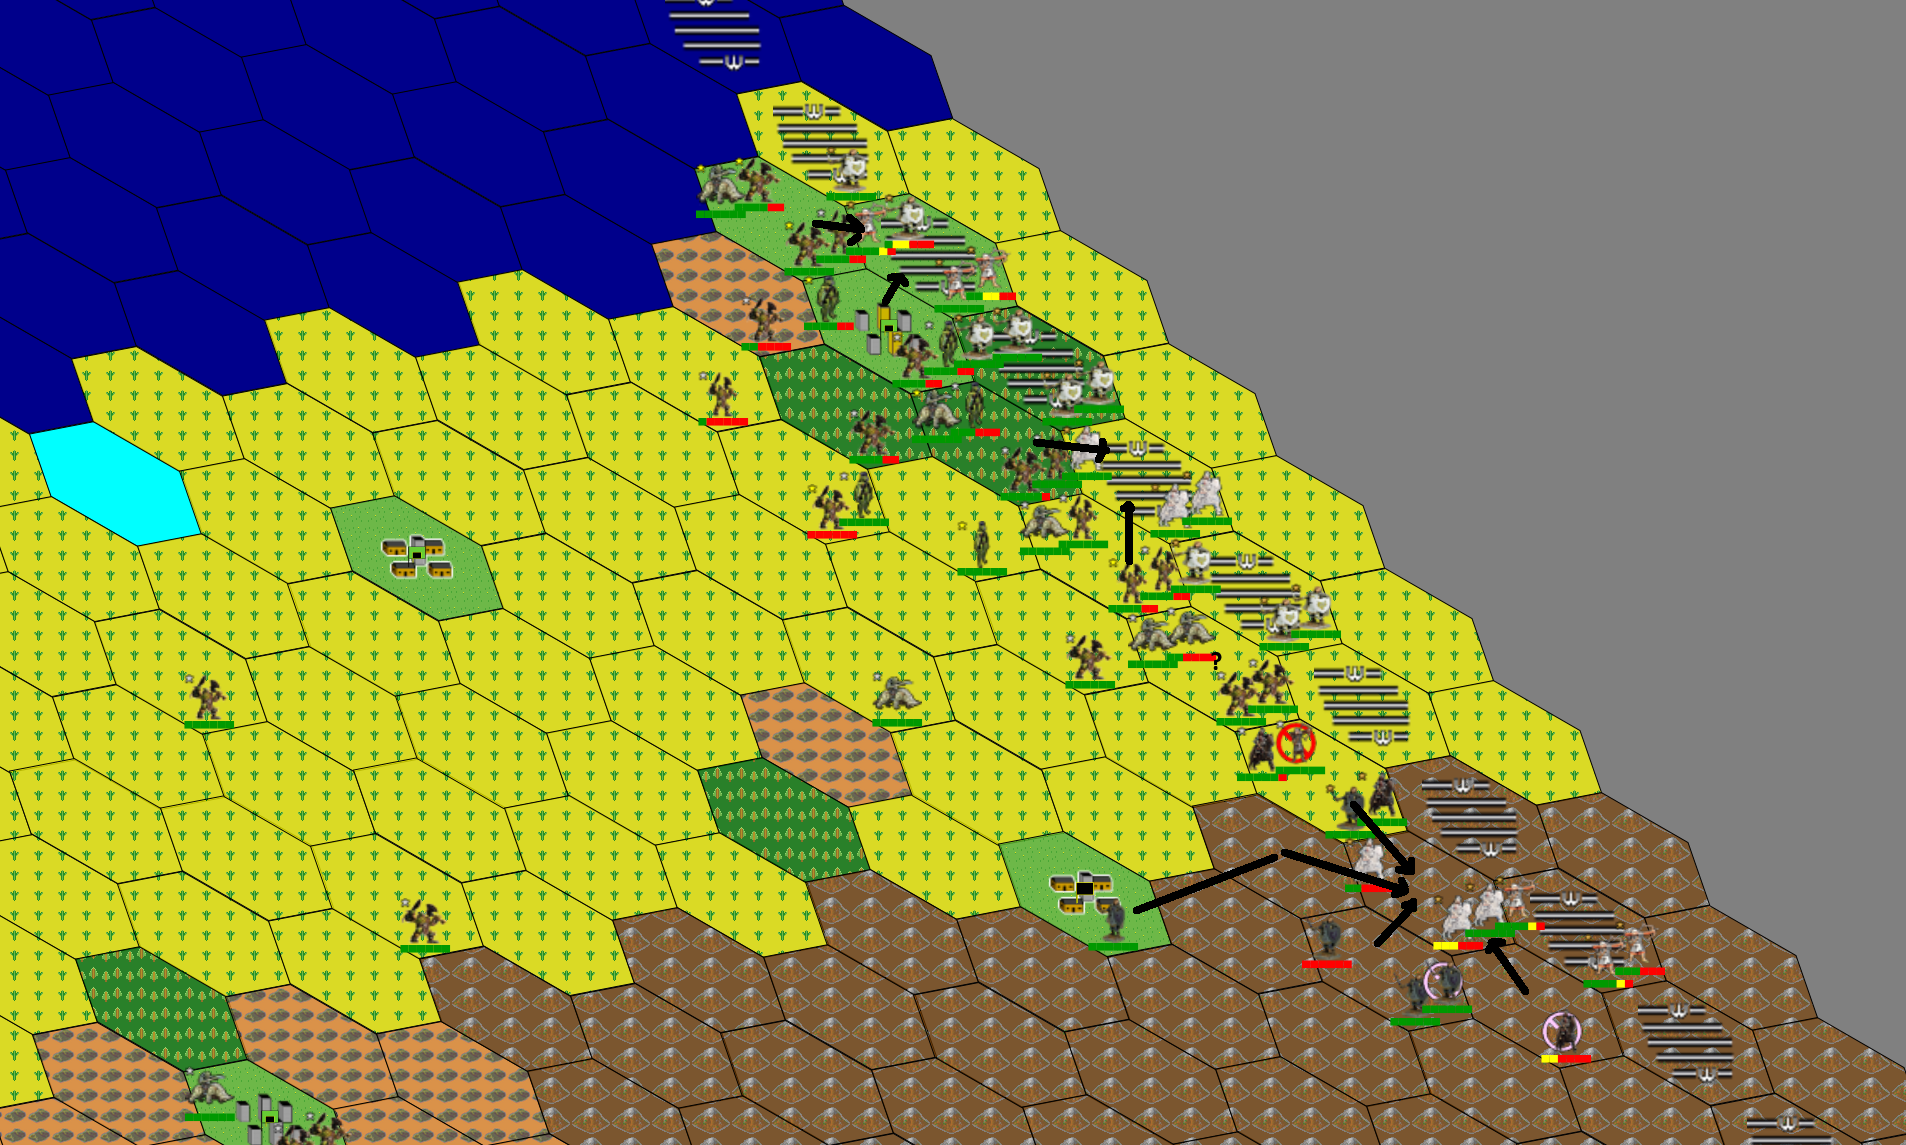
They will fix what they can, swap out units where appropriate, and launch attacks with paired hexes as shown by the arrows. It's going to be a toe-to-toe slugging match. The Orcika Korps won't be the one out for the count when the smoke clears. The enemy breakthrough in the corner? Our allies just reply, "It's the Italian Job".
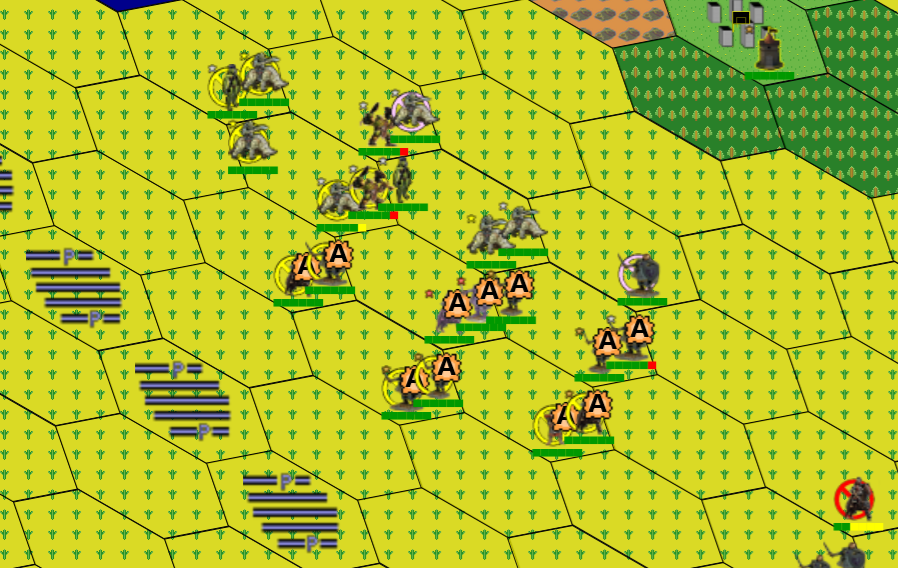
The German attack was successful, note the holes in the British line. The Germans got pretty banged up too.
It's now the Italians turn, and they want to give the British a piece of their Ravioli. The Italian effort above is better than it looks, and worthy of some examination. The plan was to hit the British breakthrough with everything they had, before the British could recover suppression or dig in. Due to a game bug on reloading that has been fixed by the time you read this, the British cleared their suppression. However they are still damaged and not dug in yet. The Italians are attacking from multiple hexes to take advantage of the flanking bonus.
The pair of units in the center is leading the attack, so the flanks will stay put on success (only the first attackers advance). A unit that's repairing can still defend some and block retreats, so it's still useful. The Italians elected to leave their heavily damaged cavalry (tanks) out of the attack, in hopes of repairing it next turn.
Before we leave for the Western front, the Italian counter-attack completely wiped out the British force. The British Archers (artillery) in turn destroyed the 2 attacking units that advanced. The next turn the Italians left a single sacrifice fly just north of the Archers to lure them out of the mountains. The next turn the Germans pounded them and that was that.
Meanwhile the British hit just south of Alexandria, damaging and knocking back the force that was there. A bit unfortunately, one of the units retreated into Alexandria, bringing it up to 4 units and delaying the production of the first of the new Guard Infantries. But we'll get that straightened out... But before we go to the Western Front, a word from our sponsors...
Meanwhile, back on the Western Front, the first American invasion wave has landed, and will now get a demonstration of Kasserine Pass.
A key thing to understand here is that units that cannot retreat surrender if they need to. The pin doesn't have to be all by your forces - neutrals, water, edge of board, other players, all will do.
Since we're in the unusual situation of having 2 human players, we'll do a one-two punch. On the German turn, the Germans will attack and destroy one group, or force parts of it to retreat. It will also create a blocking wall of Germans. Then on the Italian turn, we'll finish off any survivors and the second group.
Back in your places, people, the next show begins in 5 minutes. Unlike the Eastern front, I have the luxury of setting up back from the barrier line. It gives me more warning, and some room to do surround strategies if appropriate. Note my line's position on the "up" hex of coastline. This gives me an extra hex of attacking room compared to my enemies. Naturally repair and keeping production going are continuing concerns.
There is plenty more fighting to be done, but this concludes this section of the strategy guide.